
The Steps
When you transfer a live website to one of our affordable web hosting packages, it is recommended that you test the transfer before switching DNS records to check for errors that may occur between server environments. As a matter of fact, as it turns out, you can do this with a fairly easy computer trick.
What we will be doing is essentially telling your personal computer where to resolve your existing domain name. So, instead of loading the live website that everyone else sees, your computer will connect to the new server / IP. In layman’s terms, this means you can test a web space stress-free before switching DNS. Don’t worry if this all sounds confusing, it’s really easy – we promise – and useful.
To do this, you need:
- To obtain your server’s IP address.
- To edit the hosts file on your computer.
How to get my servers IP address?
You can find the correct IP address inside your cPanel account.
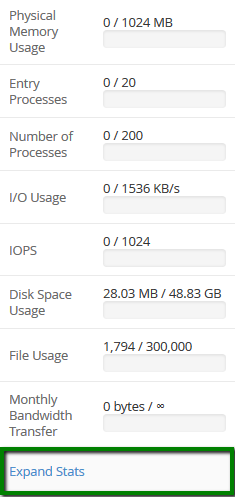
Login to cPanel (refer to your hosting welcome email for these credentials) and then click Expand stats > Server Information :
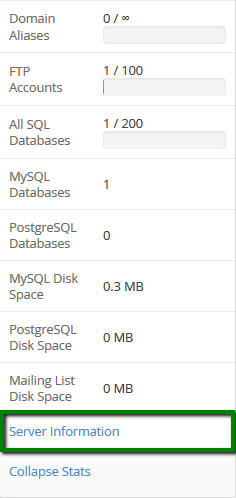
You will be taken to Server Information menu where you can find Shared (Dedicated) IP Address:
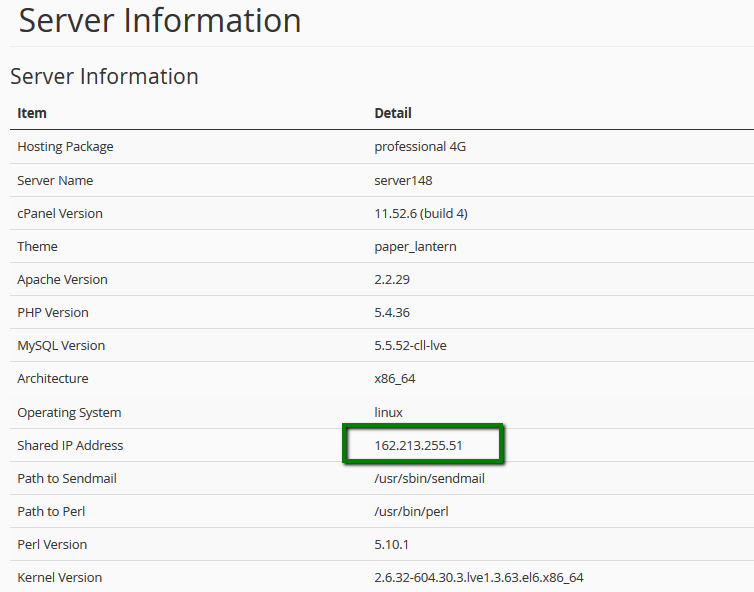
Keep note of this IP address, as you’ll need it for the next step (editing your hosts file).
Modifying your hosts file (Windows)
The ‘Hosts’ file is a computer file used by an operating system to map hostnames (domains) to IP addresses.
By adding the corresponding records to you local hosts file you can check how your website looks on the new server before switching the nameservers or during the DNS propagation. Once the records are added, you will be able to check your website by typing its domain name in a browser.
In simple words, you force your local computer to resolve the domain from the specific IP overriding public DNS records. This is great because now you can work on your website hosted on the new server, and the rest of the world will be directed to the working website on the old server.
We recommend closing the browser before performing the changes to the file.
To edit the ‘hosts’ file in different operating systems, you need to perform the following steps:
Windows 7
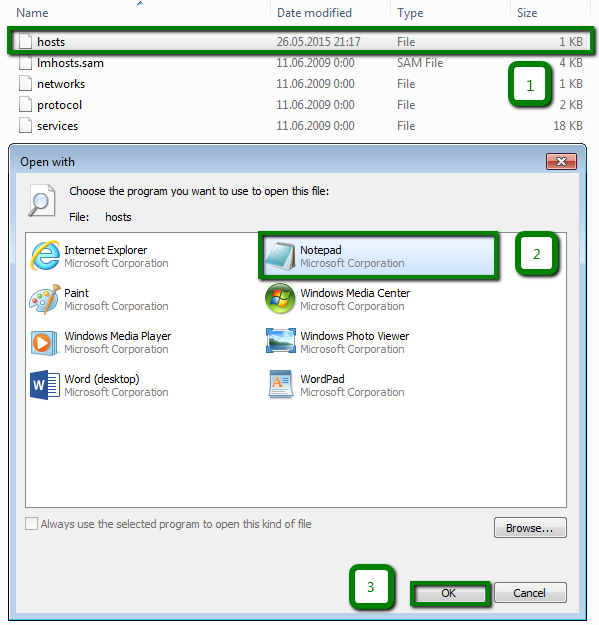
1. Open the folder C:\Windows\System32\drivers\etc:

2. Double-click on the ‘hosts’ file and choose Notepad from the list of available software:
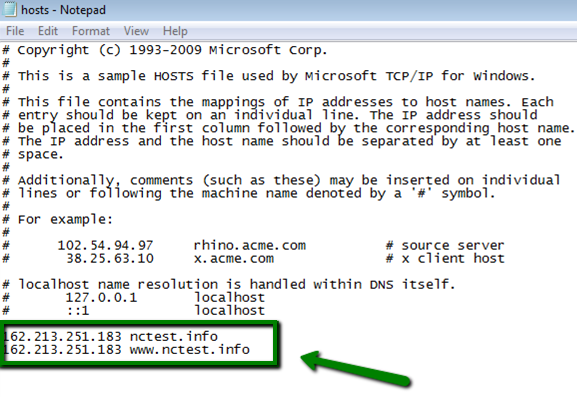
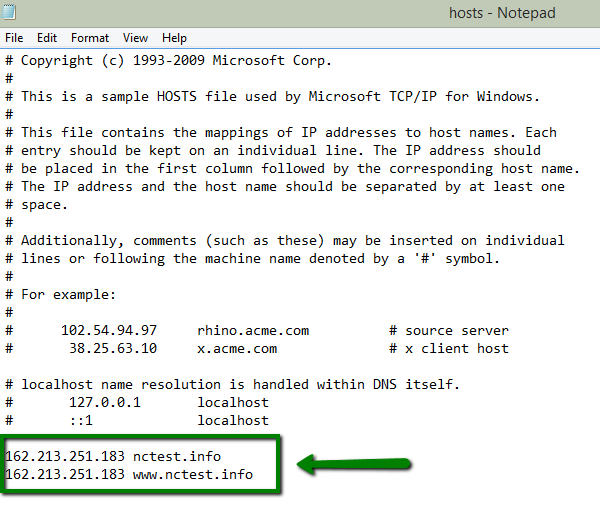
3. Input the following strings in the end of the document:
IP_address: 127.0.0.1
Domain Name: yourdomain.com
where IP_address is the IP address of your account on the server (it can be found in the Your NEW Hosting Account email) and yourdomain.com is your actual domain name:
4. Save the changes.
5. Now you need to clear the browser’s cache and re-open your domain name in it to see the changes.
NOTE: To revert the changes, you need to remove the new entries added to your host file or simply comment them out by adding ‘#’ symbol at the beginning of each line, then save the changes. You may need to clear your browser cache once again to ensure everything is fresh.
Windows 8
As an alternative to the instructions above, you can edit the ‘hosts’ file on Windows 7 or Vista in another simple way as described for Windows 8 or 8.1 below:
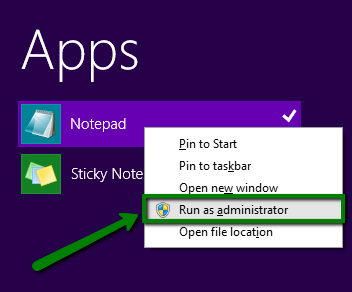
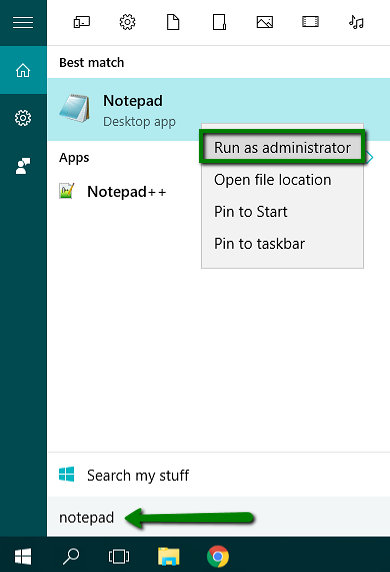
1. Open Notepad with Administrative privileges by clicking the Start button 
2. Find Applications > type Notepad in the search bar and then right-click Notepad and select to Run as Administrator:
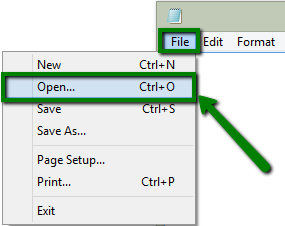
3. Once Notepad is opened with Administrative privileges, click the File menu > choose Open:
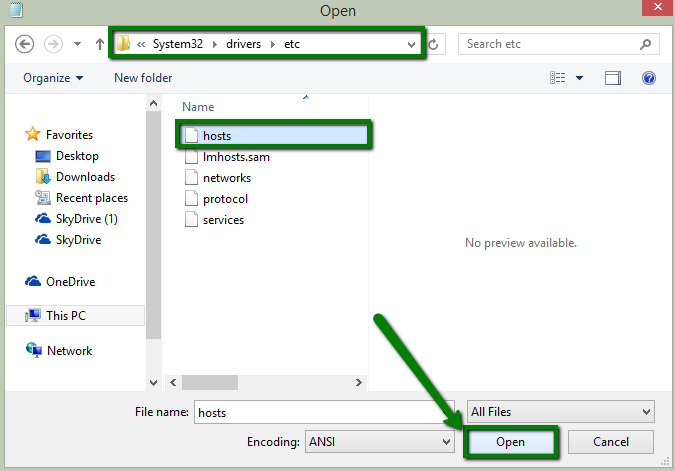
4. Browse to C:\Windows\System32\drivers\etc (you may simply copy this path into the address bar and click Enter):

5. Click to show All Files:

6. Choose the ‘hosts‘ file and click Open:
7. Insert the following strings at the end of the document:
IP_address: 127.0.0.1
Domain Name: yourdomain.com
where IP_address is the IP address of your account on the server (it can be found in the Your NEW Hosting Account email) and yourdomain.com is your actual domain name:
8. Save changes.
9. Now you need to clear the browser’s cache and re-open your domain name in it to see the changes.
NOTE: To revert the changes, you need to remove the new entries added to your host file or simply comment them out by adding ‘#’ at the beginning of each line, then save the changes. You may need to clear your browser cache once again to ensure everything is fresh.
Windows 10
1. In the Search Window type in notepad > right-click on the Notepad icon > select Run as administrator:
Notepad window will open.
2. In Notepad, press the Ctrl + O keymatch > navigate to the C:\Windows\System32\drivers\etc\ directory > open hosts file:
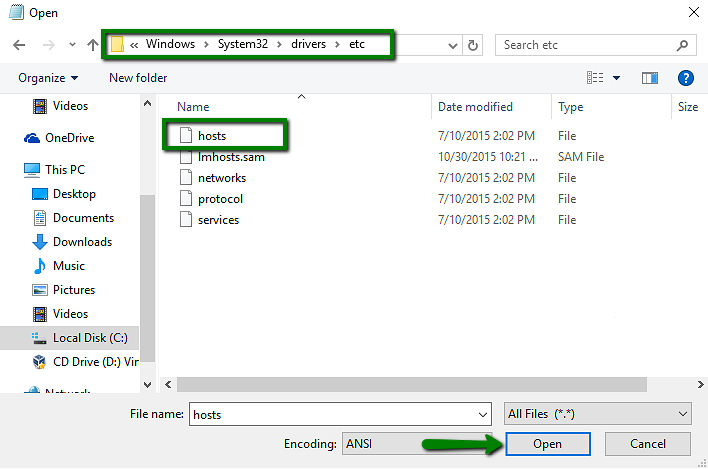
NOTE: If you cannot see the hosts file, select All Files (*.*) in the dialog box:

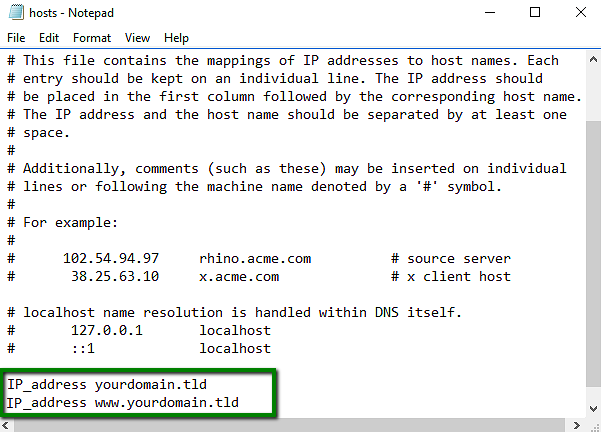
3. Add the following entries at the end of the file:
IP_address: 127.0.0.1
Domain Name: yourdomain.com
where IP_address is the IP address of your account on the server (it can be found in the Your NEW Hosting Account email) and yourdomain.com is your actual domain name:
4. Press Ctrl + S to save the changes.
Modifying your hosts file (Mac)
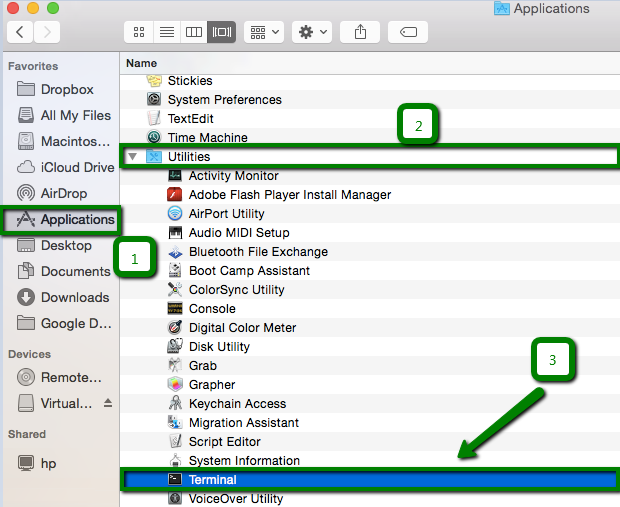
1. Open Terminal.app, either by start typing Terminal on the Spotlight, or by going into Applications > Utilities > Terminal:
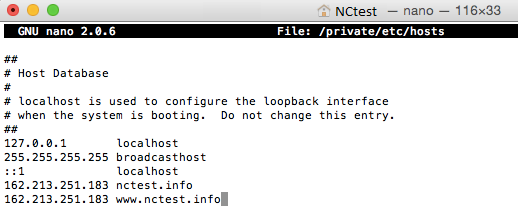
2. Open the hosts file by typing on the Terminal that you have just opened:
sudo nano /private/etc/hosts

3. Type your user password when prompted (you can navigate the file using the arrow keys).
4. Edit the hosts file appending your new mappings underneath the default ones:
IP_address: 127.0.0.1
Domain Name: yourdomain.com
where IP_address is the IP address of your account on the server (it can be found in the Your NEW Hosting Account email) and yourdomain.com is your actual domain name:
5. Save the hosts file (use the key at the bottom of your terminal window to save and exit your terminal application.).
6. Flush the DNS cache (you can issue a simple Terminal command to flush the DNS cache depending on the version of OS X you are using and have your host file changes to take immediate effect).
NOTE: To revert the changes, you need to remove the new entries added to your host file or simply comment them out by adding ‘#’ at the beginning of each line, then save the changes. You may need to clear your browser cache once again to ensure everything is fresh.
How do I share my website?
At some stage, you may wish to share your website with people such as your family, friends, clients, etc. A company called SkipDNS has created a really easy way to generate a private shareable link (without your friends having to follow the steps above).
To do this:
- Go to https://skipdns.link
- Now enter your IP address (from step 1) in the “hosted on” field.
- Go ahead and enter your domain name into the “preview” field.
- Now click ‘Go.’ That’s it! Share!