Once your Internet radio station is up and running, you’ll want to ensure it’s been setup as a ‘public station’.
Not doing so will mean your listener reach (and market size of potential listeners) will drop significantly, as directories won’t be able to find your radio station.
So how do I take my station public?
- To start, login to your Centova Cast account as normal.
- Now click Settings in the left-hand navigation
- Next, check your Server Overrides and ensure the Public Server setting is showing
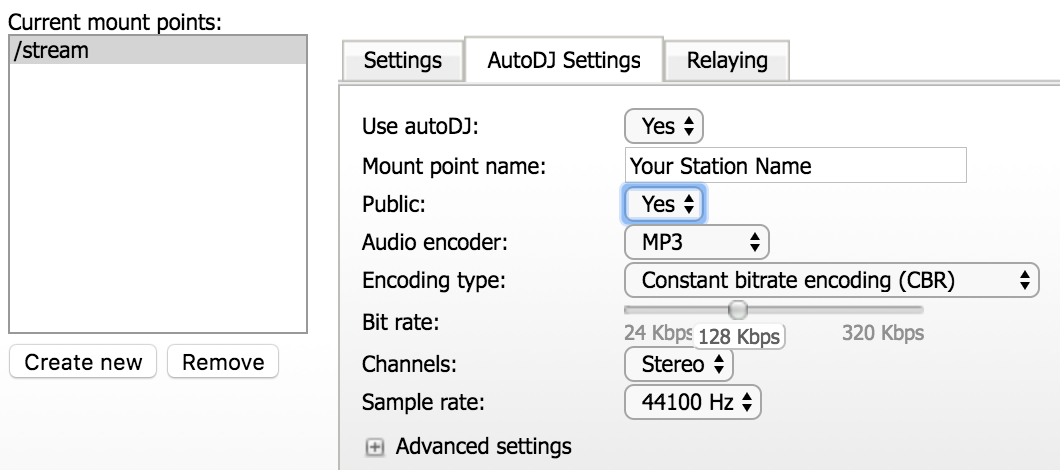
'Always'. - Now that’s sorted, make your way to Mount Points before clicking /stream (or the mount point you wish to publise.
- Ensure the
Publicsetting is configured to Yes.


NOTE: Remember to click Update and then Restart your server for the changes to take effect.
How do I test/find out if my station is public?
After following the steps above, click Admin, found in your left-hand navigation.
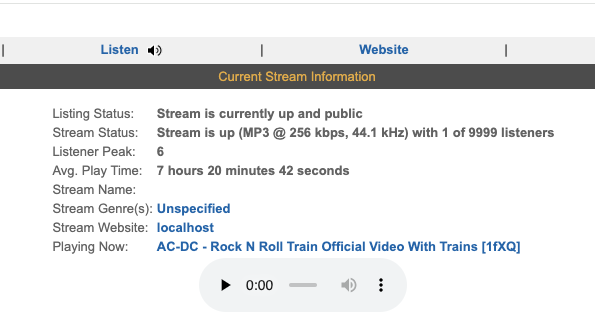
This will redirect you to your station D.N.A.S summary page. If your station is up and public, your summary should reflect this.

Mine shows another message!
If you’ve followed the steps above, and you’re seeing a message like “Station is public but not listed…”, you’ll need to setup your SHOUTcast Authhash.
To do this:
- Remain on the SHOUTcast D.N.A.S Summary page.
- Make your way to the top right hand corner before clicking Server Login.
- A modal popup will appear, asking for your login credentials. Try these:
Username: Admin
Password: (The admin password you use to login to your Centova account). - Awesome, we’re almost there. Now click Create Authhash.
- Fill in the details as requested.
- Save and refresh.
- Congrats! Your station will now be public and should show “Stream is currently up and public” under your listing status.
